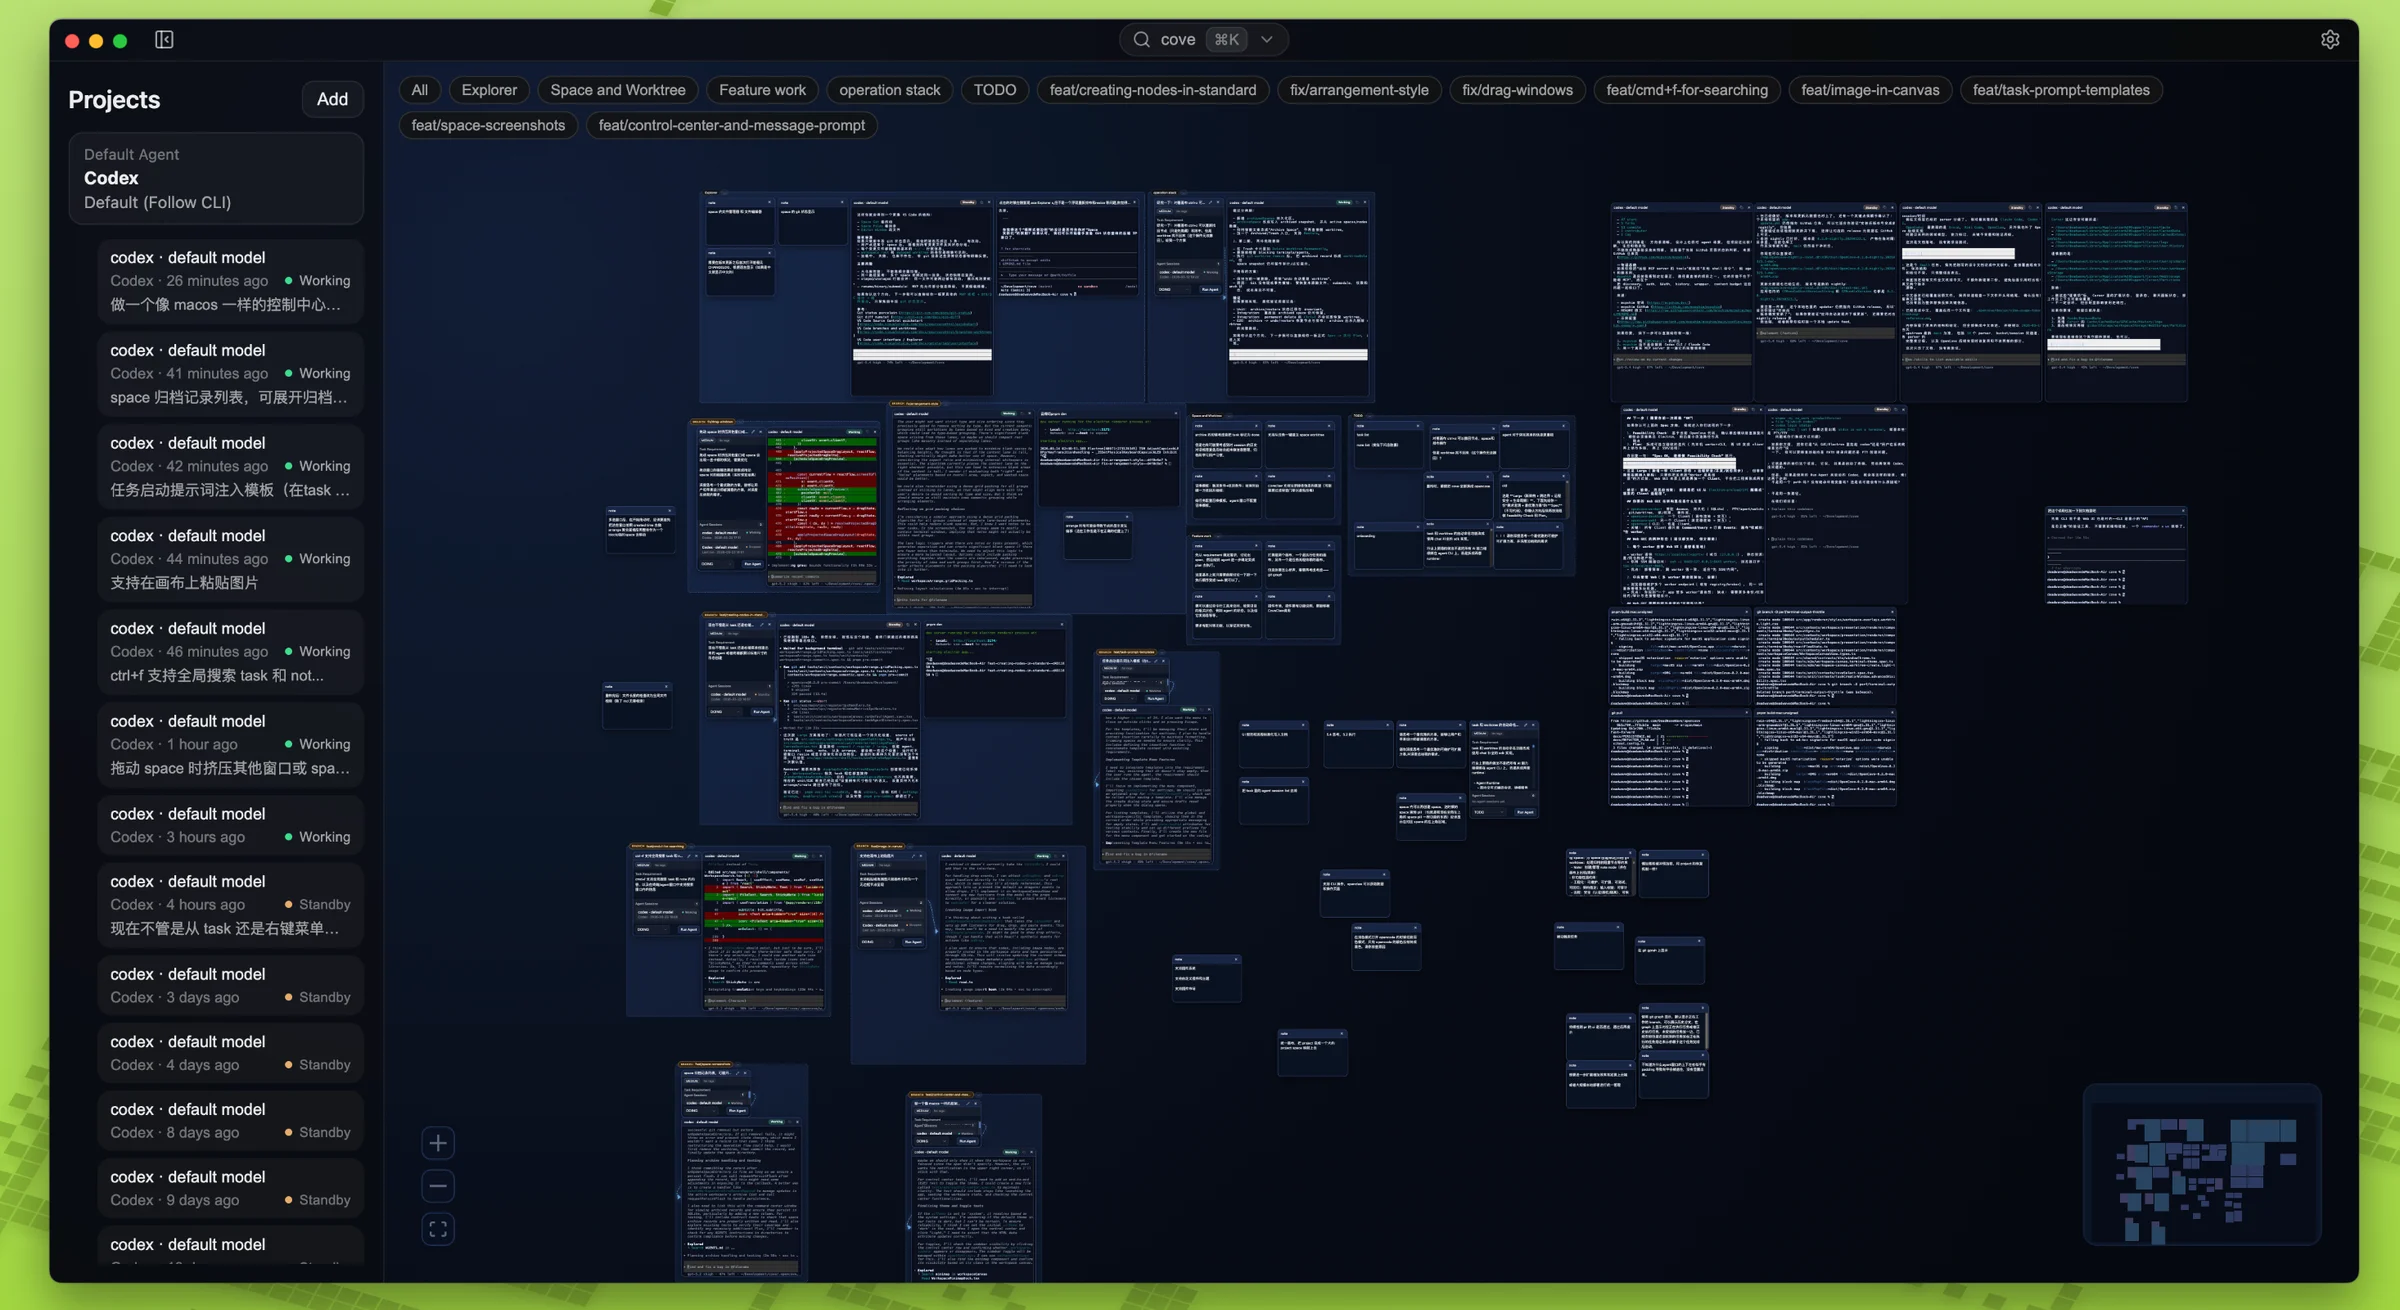
OpenCove · AI 编程项目中心
 VibeMySpace 精选@vibemyspace-curated
编辑介绍
以空间布局管理个人的多 Agent 项目上下文。
AI 用途:在无限画布中并列组织 Claude Code、Codex、终端、任务与知识。
使用方式:自身不调用模型 API,只把用户已安装的 Claude Code、Codex 和终端进程放进无限画布。
原帖正文
OpenCove 🌌
An infinite canvas for Claude Code, Codex, terminals, tasks, and notes.
Keep every agent, terminal, task, and note on one infinite canvas.
See parallel work at a glance, keep context visible, and resume exactly where you left off.
Download the latest builds · Read the Chinese README
📖 What is OpenCove?
OpenCove is a spatial development workspace for people who work with AI coding agents every day.
Instead of burying work inside tabs, sidebars, and long chat threads, OpenCove puts your AI agents, terminals, tasks, and notes on the same infinite 2D canvas, so the full state of your work stays visible.
It is built for workflows like:
- Running multiple
Claude CodeorCodexsessions side by side - Keeping task plans, notes, and terminal output in one shared workspace
- Switching projects without losing layout, context, or execution history
✨ Highlights
- 🌌 Infinite spatial canvas: Arrange terminals, notes, tasks, and agent sessions the way you actually think.
- 🤖 Built for CLI agents: Optimized for
Claude Code,Codex, and similar terminal-native agent workflows. - 🧠 Context stays visible: Planning, execution, and results live together instead of getting buried in linear chat history.
- 💾 Persistent workspaces: Restore your viewport, layout, terminal output, and agent state after restarts.
- 🗂️ Space archives: Snapshot and revisit previous workspace states when you need to jump back into old contexts.
- 🖼️ Rich media and smart layouts: Paste images, multi-select nodes, use label colors, and tidy messy boards quickly.
- 🔍 Global search and control center: Search across the canvas and terminal output, then manage active sessions from one place.
- 🗂️ Workspace isolation: Separate projects cleanly with directories and git worktrees.
💡 Why OpenCove?
OpenCove is designed around a simple idea: agent workflows are easier to reason about when context is spatial, not hidden.
| Pain Point (Traditional) | The OpenCove Workspace | | :--- | :--- | | Linear amnesia: context disappears into long chat histories. | Spatial context: important tasks, notes, and execution stay visible on the canvas. | | Single-pane bottlenecks: tabs and split panes force constant context switching. | Parallel execution: compare and monitor multiple agents without losing your place. | | Opaque automation: background agent work feels like a black box. | Transparent actions: terminals and side effects stay visible while work is happening. |
🚀 Getting Started
OpenCove is currently in Alpha. We recommend it for early adopters and power users who want to explore spatial AI workflows.
Download
Prebuilt binaries are available on the GitHub Releases page.
At the moment, most public builds are nightly / prerelease builds, which means:
- You get the newest features first
- You should expect rough edges
- Feedback and bug reports are especially valuable
Downloads are available for macOS, Windows, and Linux.
⚠️ macOS note Current macOS builds are not signed or notarized with an Apple Developer ID. If Gatekeeper blocks the app, run this in your terminal:
xattr -dr com.apple.quarantine /Applications/OpenCove.app
CLI and Server Install
You now have two supported ways to install the opencove CLI:
- From the Desktop app: open Settings → Worker → CLI and click Install CLI.
- Without Desktop: use a GitHub Release that includes standalone runtime bundles
(
opencove-server-*) plus release-specific installer assets such asopencove-install-v<tag>.sh/opencove-install-v<tag>.ps1. Stable releases also publish the genericopencove-install.sh/opencove-install.ps1aliases, which always target the latest stable release.
If releases/latest/download/opencove-install.sh returns 404, the latest stable release
has not published the standalone installer yet. In that case, use the Desktop installer for
now or wait for a release that includes those assets.
For the latest stable release, install on macOS / Linux with:
curl -fsSL https://github.com/DeadWaveWave/opencove/releases/latest/download/opencove-install.sh | sh
On Windows, use PowerShell:
powershell -NoProfile -ExecutionPolicy Bypass -Command "Invoke-RestMethod https://github.com/DeadWaveWave/opencove/releases/latest/download/opencove-install.ps1 | Invoke-Expression"
For a nightly or any specific tagged release, use the versioned installer asset from that release page:
curl -fsSL https://github.com/DeadWaveWave/opencove/releases/download/v<version>/opencove-install-v<version>.sh | sh
powershell -NoProfile -ExecutionPolicy Bypass -Command "Invoke-RestMethod https://github.com/DeadWaveWave/opencove/releases/download/v<version>/opencove-install-v<version>.ps1 | Invoke-Expression"
For a headless server that hosts the Web UI, start the worker directly after install:
opencove worker start --hostname 0.0.0.0 --web-ui-password 'change-me'
This prints the Web UI URL and enables password login for browser access. Keep the password set whenever you expose the Web UI beyond localhost.
Building from Source
Prerequisites
- Node.js
>= 22.12.0 - pnpm
9.6.0 - (Recommended) Globally install
Claude CodeorCodexto experience full agent workflows.
Build Instructions
# 1. Clone the repository
git clone https://github.com/DeadWaveWave/opencove.git
cd opencove

# 2. Install dependencies
pnpm install

# 3. Start the dev environment
pnpm dev
See RELEASING.md for more packager and build documentation.
Web UI (Experimental)
OpenCove includes an experimental Worker-hosted Web UI so you can open the canvas from a browser (including other devices on your LAN).
- In Settings → Experimental → Worker Web UI, turn on Enable Web UI (optionally set a fixed port), then start the Local Worker.
- By default it is loopback-only (
127.0.0.1). For LAN access, enable LAN Access and set a Web UI password. - Dev note: LAN access uses the built
out/rendererbundle (no HMR). Runpnpm buildafter UI changes.
More details:
docs/architecture/CONTROL_SURFACE.mddocs/runtime/WEB_UI_TROUBLESHOOTING.md
🏗️ Technical Architecture
OpenCove is built with modern, high-performance web standards:
- Framework: Electron + React + TypeScript (via
electron-vite) - Canvas Engine:
@xyflow/reactfor buttery smooth infinite canvas interactions. - Underlying Terminal:
xterm.jsandnode-ptypowering full-fledged PTY runtimes. - Testing:
VitestandPlaywrightfor robust unit and E2E regression testing.
🤝 Contributing
OpenCove is open source. We need your help to define what the IDE of the AI intelligence era should look like. Read our guidelines below:
- Contributing Guidelines (CONTRIBUTING.md)
- Code of Conduct (CODE_OF_CONDUCT.md)
- Support (SUPPORT.md)
- Trademarks & Brand Guidelines (TRADEMARKS.md)
💬 Community Group
Scan the QR code below to join the OpenCove community group and chat with other users.
<p>Redefining dev environments for the modern web. Built with ❤️ by the OpenCove Team.</p>
来源与作者
- 原作者:DeadWave (@DeadWaveWave)
- 发布平台:GitHub
- 原帖:查看原帖
- 权利说明:VibeMySpace 仅作带来源的整理展示,内容与图片权利归原作者。
开源信息
已开源。